


Description
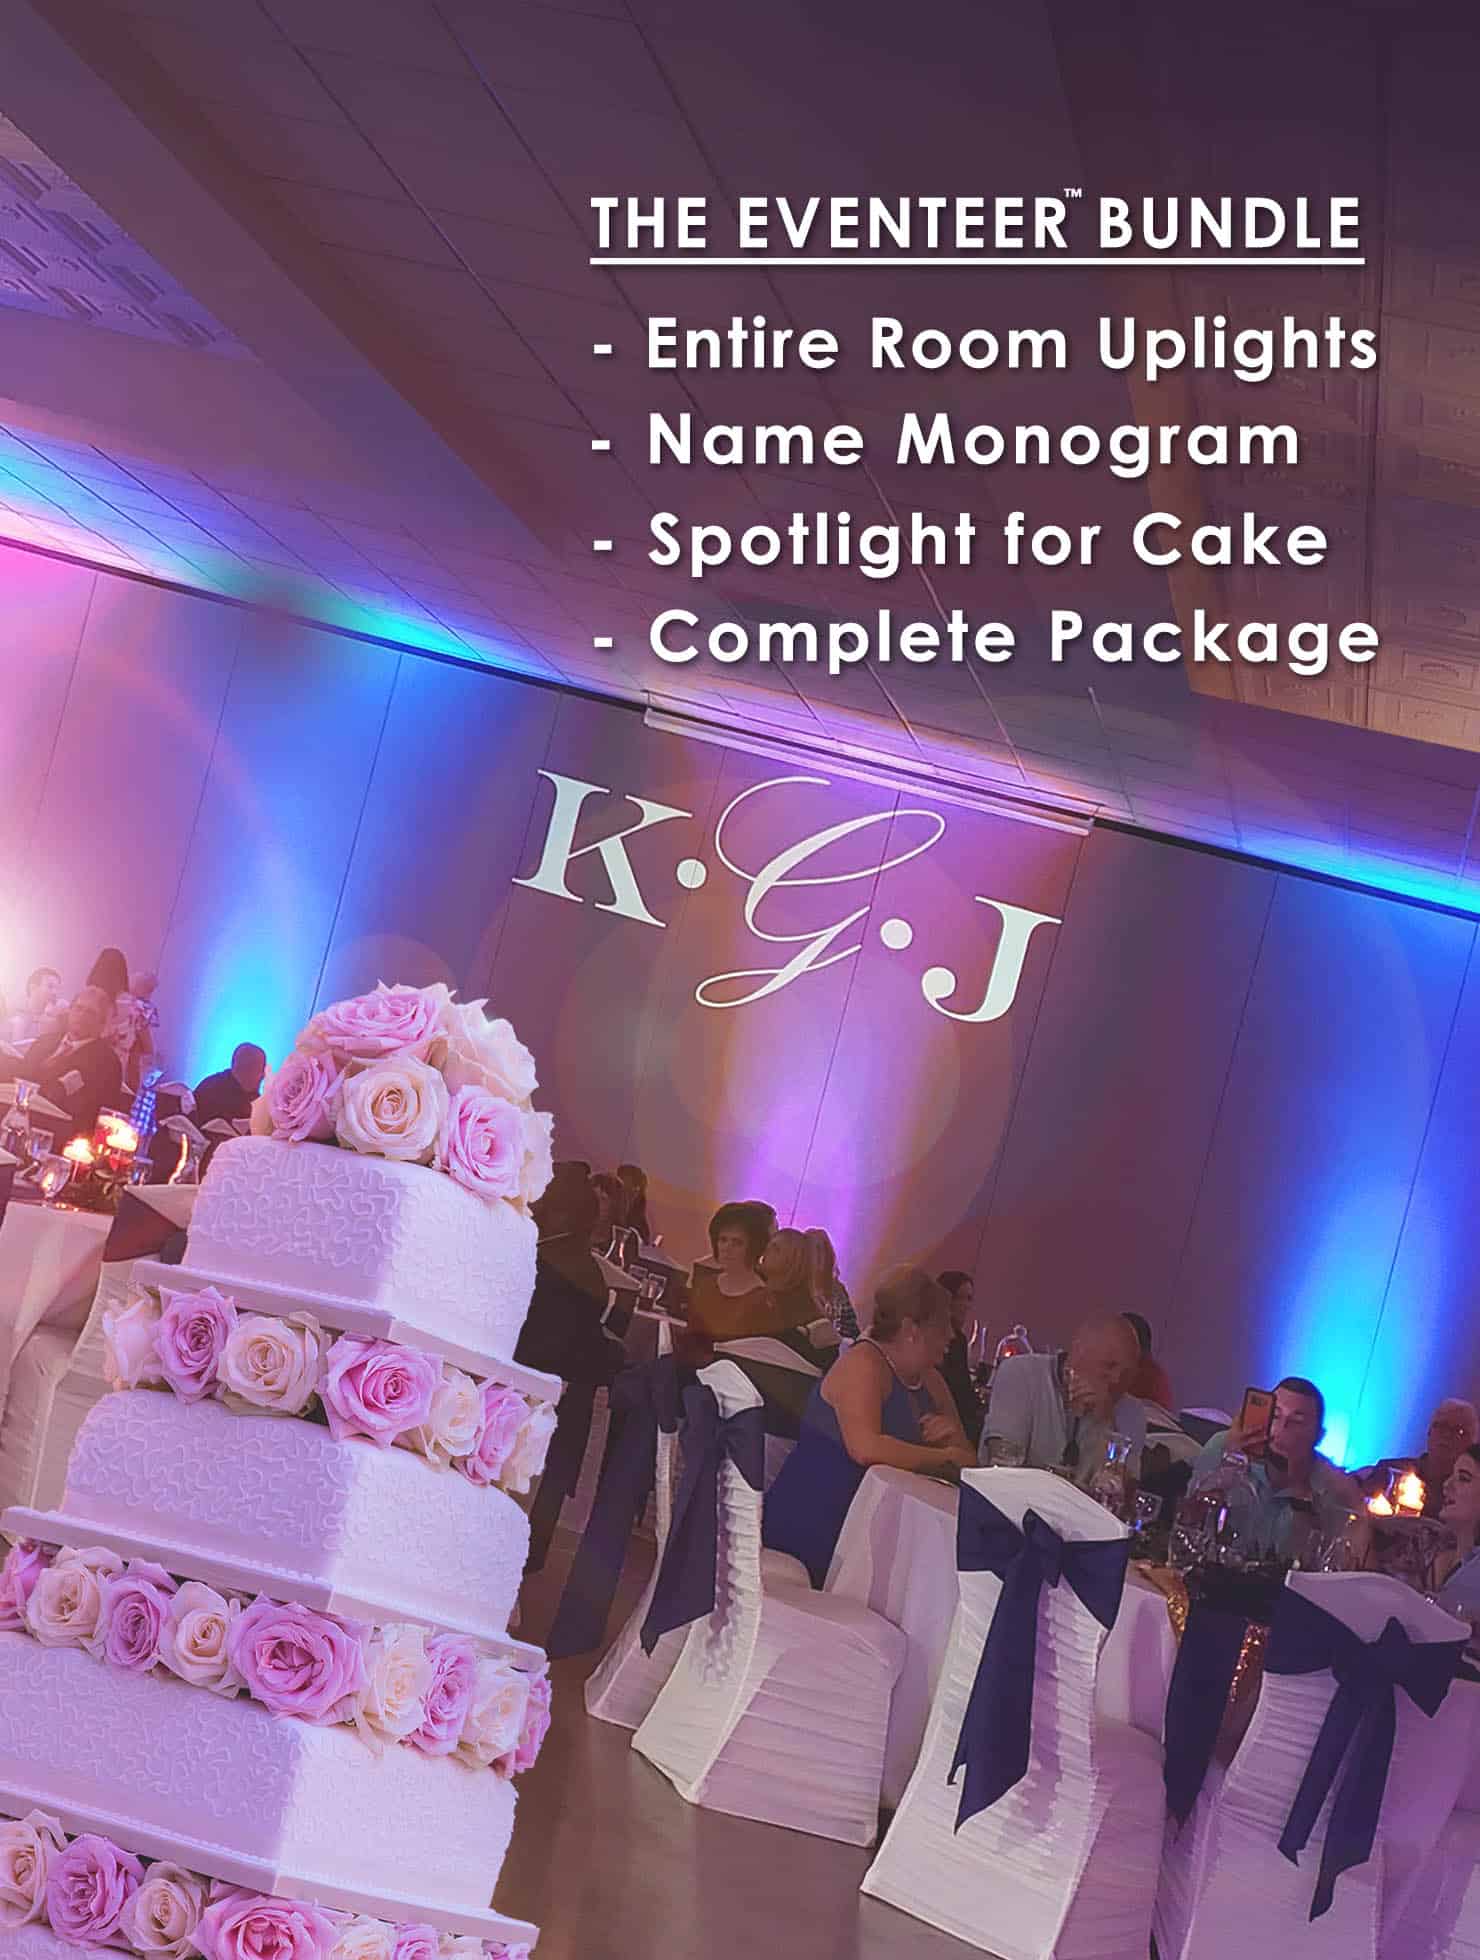
Uplighting, monogram, & pinspot bundles are the most cost-effective solution for DIY wedding receptions & event gatherings. We consider these rentals the trifecta of transforming your space with color. Are you concerned with how much local vendors are charging? Stop overpaying for your party, do this yourself so it is done right and you save on your budget. For even more options check out our EPIC Experience Package. Learn how this lighting package will make your night amazing! Read More...
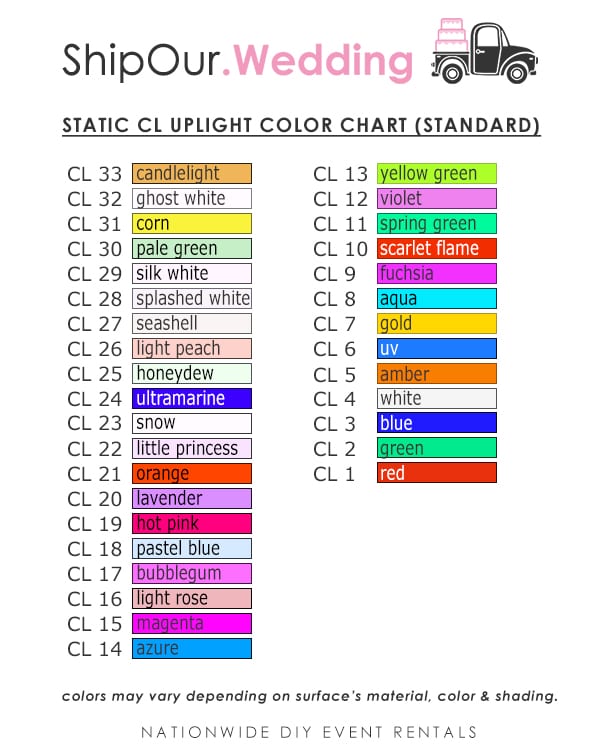
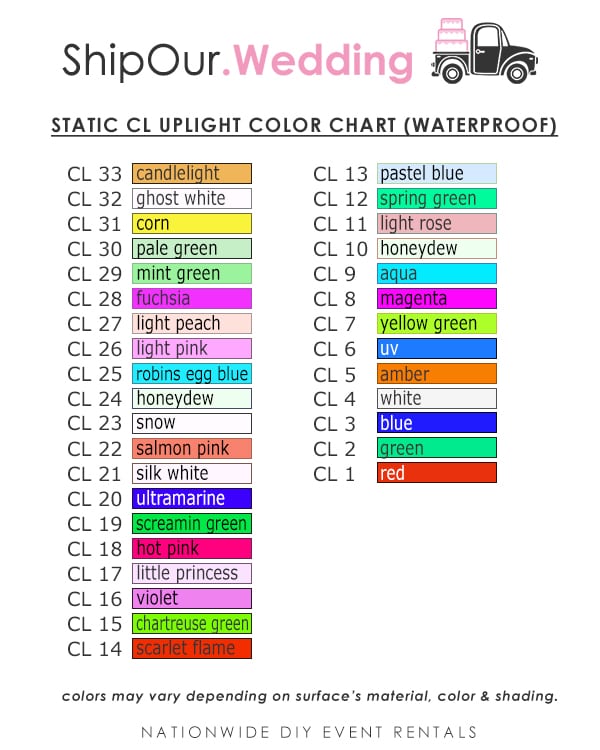
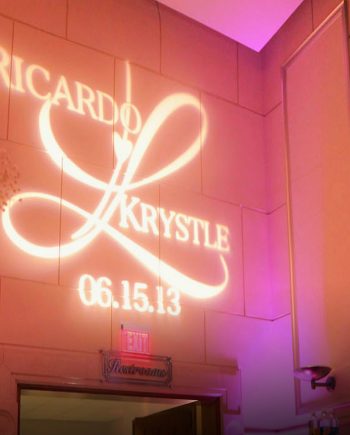
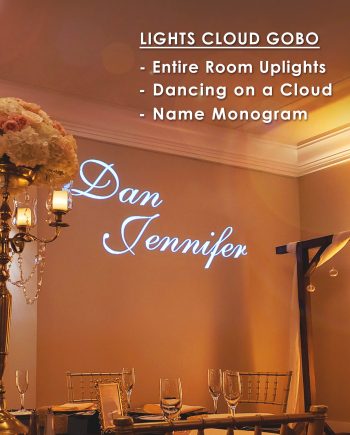
The wall monogram is a fast and noticeable way to brand your party. Display your name or message on a wall for everyone to see. It will create a beautiful look in your photos. When you combine the wall monogram with entire room uplighting, your colors REALLY pop. Easily program (10) or more uplights with our choice of pre-programmed static colors. You can also use our uplighting color chart in the tabs below. Use the pinspot as a spotlight to make your cake look larger than life.
THINK OF IT AS THE NATION’S BEST VALUE WEDDING BUNDLE
Always remember that when your lights are dimmed you will need event lighting. ShipOur.Wedding® Lighting Design package is created with you and your DIY budget in mind. Get more for less at your upcoming event and make your room and event details shine at an affordable price. Check your date’s availability below and reserve the nation’s best value in wedding lighting.
LEARN how to email custom artwork after you have placed an order
Check Out the Most Important Info to Remember With this Bundle >>
.
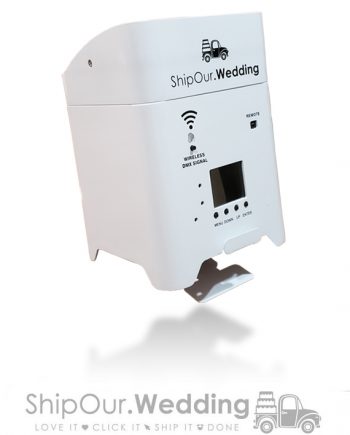
Room Uplights
- Don’t set up any lights in public places (public venues are not ideal for rentals when you are responsible for shipping everything back to us in one piece)
- You do not want to misplace any boxes for shipping or packing foam (a great place to put cases when not being used is a room that can be locked during your event)
- Use the side bracket on uplight to direct the beam onto your wall (avoid tightening too much so the screw doesn’t break)
- You can hide and cord coming from the back of the light since the uplight is right next to a wall (coil it up and make it so it isn’t visible)
- We have extension cords available for rental if you know in advance that your plugs have distance between them (this saves time)
- For optimal results aim your uplights up a wall with a slight angle towards it, this gives the best brightest look
- Lighting should not be used in areas with heavy foot traffic, they might get kicked to the side and have to be re-adjusted
- We always suggest that any lighting used should be hugging a wall so that guests have space to move around them
- When setting up lights, look at the spacing between each light to ensure it is even for your photos
- Safety is important when running power cables to lights, tape down on door openings & place a rug over it
- Rooms with windows let in light, uplights will look better once the sun is gone find out when the sun sets here
- Avoid the public with your rentals, you need to keep an eye on your rentals while it is in your possession
- You need to ship back not only the rentals but the foam inserts with cases (be sure that no other vendor accidentally grabs any equipment mistaking it for theirs, store rentals with packaging in a different room when not in use)
- You might need a ladder during your setup, this is not needed unless you have specific ideas on how to mount your monogram
- You can move the projected design down or up by tightening or loosening your bracket on the side of the light (don’t make too tight the screw is delicate)
- The monogram looks best when it is aimed onto a light-colored wall (avoid wood that is dark, the same goes for brick and stone)
- The bigger your monogram looks the better, adjust the size with the top zoom and focus settings
- Your first choice for setup might not give you the best result, consider a second alternative location (the distance from your wall to light will affect the size of your pattern)
- To give a cleaner pattern, raise up your monogram with our optional light stand & plunger this is easy to use and reduces the chances of a guest walking in front of your monogram
- The more straight your light is facing the surface it is aimed onto, the better it will look when viewed from an angle (this also makes it easier to read)
- Windows with rooms may reduce the brightness of your monogram, once it is darker in the room your light will become more bright click here for when the sun sets on your event date
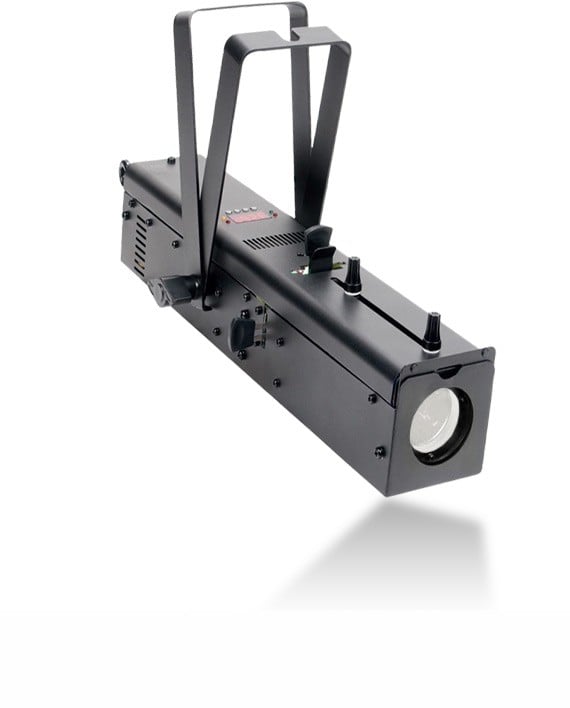
- Pinspots shouldn’t be charged in a closed space, they need to have proper ventilation so the adapter for charging doesn’t get too hot.
- Pinspots should be used at events where only your guests have access (public events are not recommended the rentals are your responsibility while in your possession)
- All shipping boxes and included foam pieces are regarded as part of your rental (hide this in an area away from others so they do not have access, this will reduce the situation of another vendor mistaking it as part of their inventory)
- Since pinspots can be attached to ceilings, you might want to have a ladder on-site
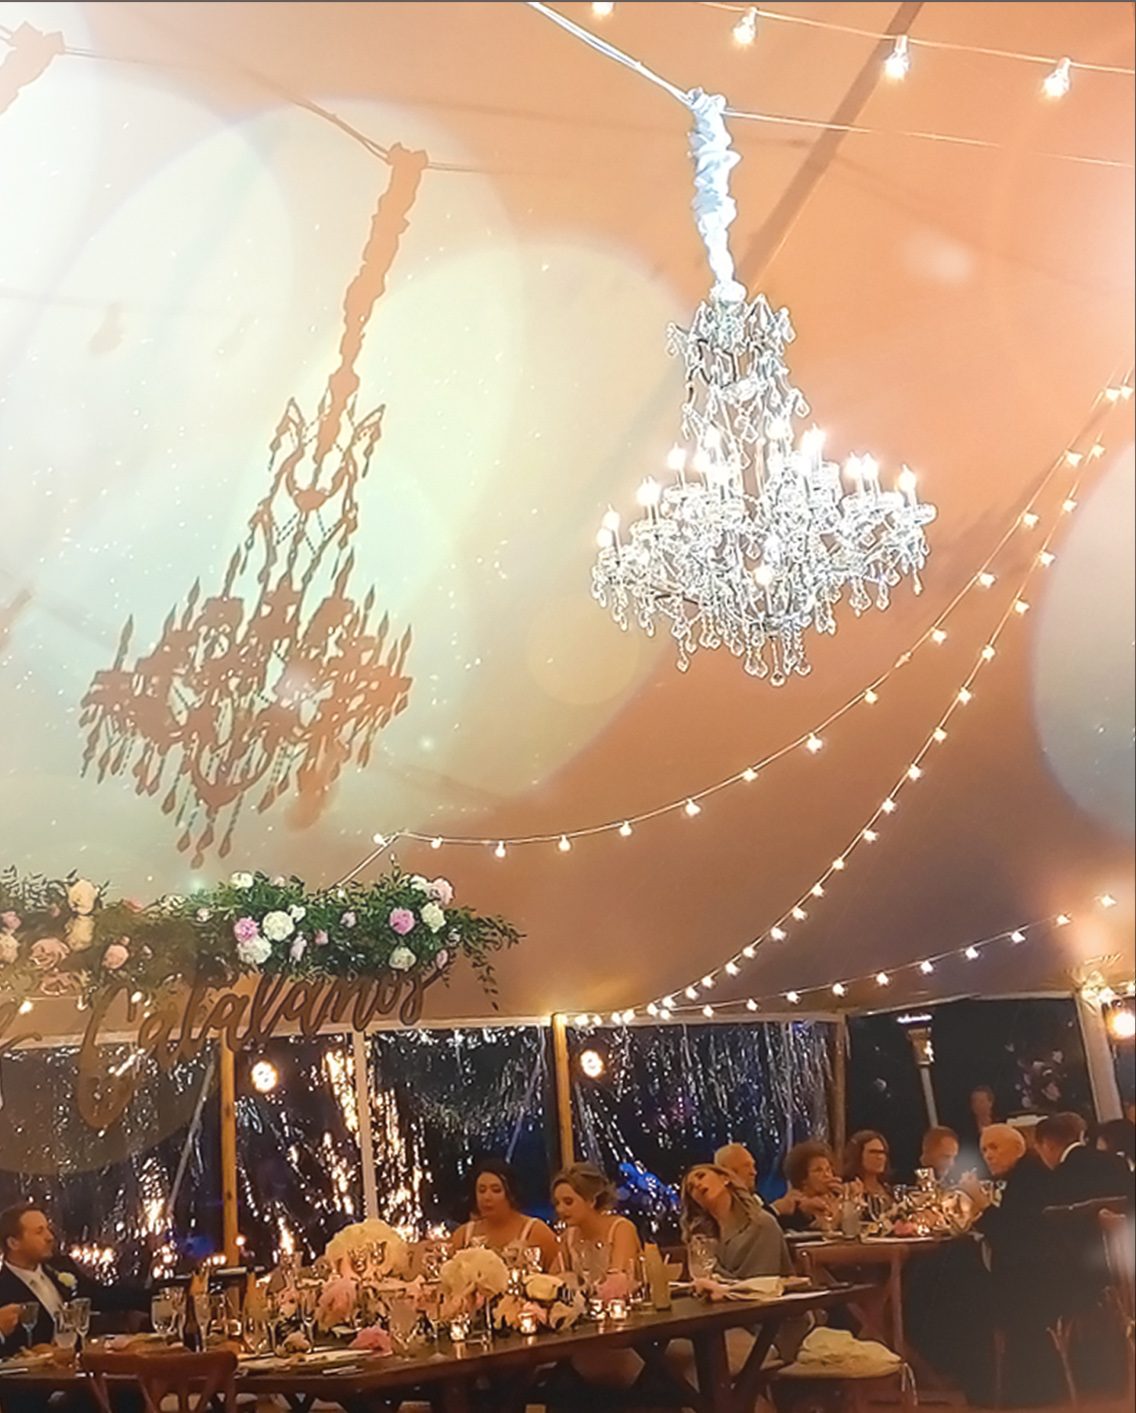
- Pinspots should not mount onto any areas that deal with fire, water, electrical, or lighting (like chandeliers), these are unstable places for mounting, find something more suitable
- You want your pinspots to aim onto the centerpiece or cake, do this by carefully rotating the light on the bracket (it swivels when the screw is loose, do not make this too tight)
- A pinspot that is directed as close to overhead on the lighting decor will give a better result, if not possible try to have this as close as possible to over the decor you want to light up
- Any pinspot mounted on a magnetic base should be away from guests (this helps ensure it stays in the same position without getting pushed over)
- Hide the magic, put a vase in front of the pinspot, guests will see the vase but not the pinspot behind
- All our pinspot rentals will ship with a battery that is 100%, this lasts about 6hrs, turn on with the button on pinspot, then shut off with the remote until your party starts (this helps to conserve your battery)
- A room with windows lets in light that takes away from your lighting effects, pinspots pop in rooms that are more dark learn when the sun sets on your date

 Get to This Page
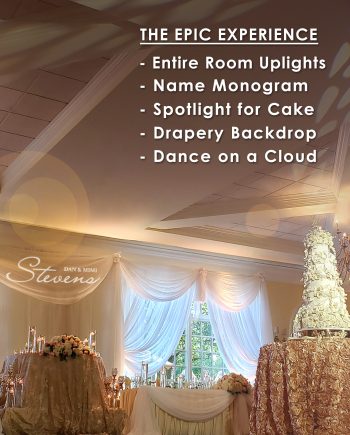
Pamela Wilson –
The lighting arrived on-time neatly packed in the shipping cases. I was surprised how easy it was to setup this lighting. I kept wondering why other companies charged so much for up lights?? I ordered wireless lighting so we didn’t need to plug anything in. The whole setup was done in less than 30 minutes. We used a mint green to compliment our spring wedding. Also the monogram looked amazing in our photos!!