


Description
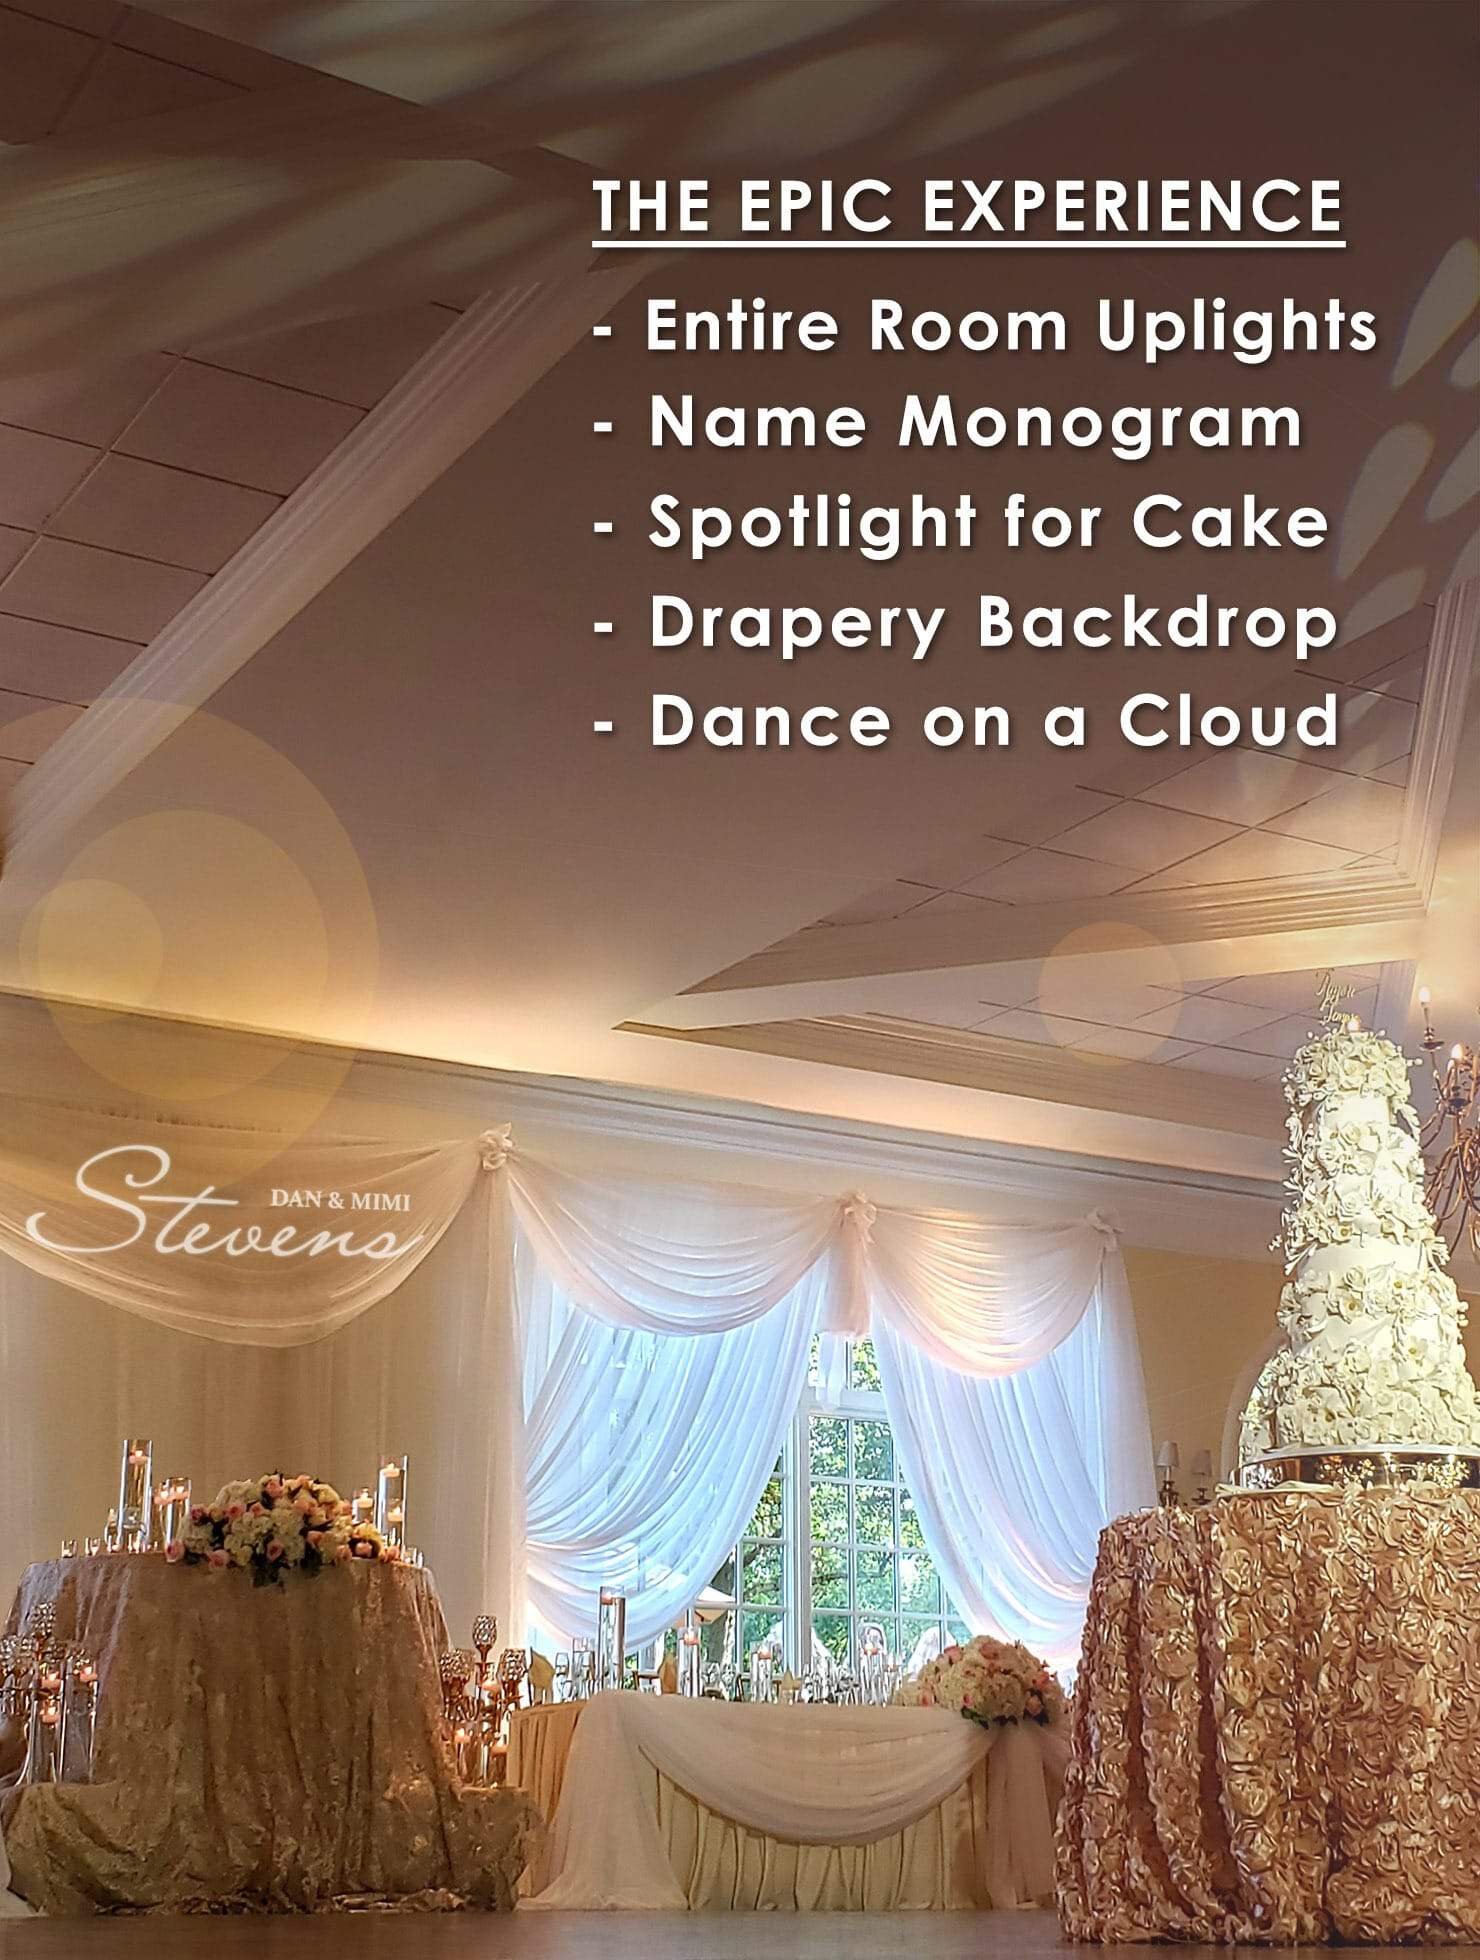
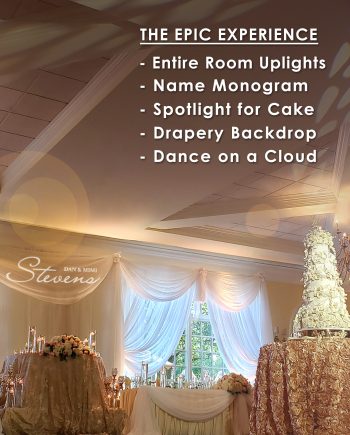
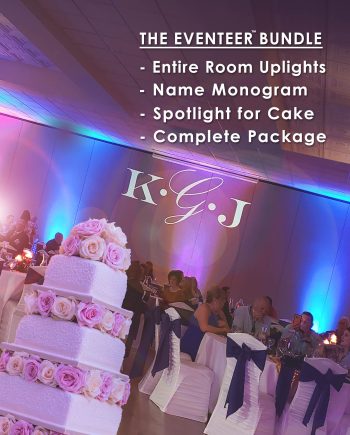
The Epic Experience Package is our most requested bundle. This package has everything that a DIY client could ask for. There is no need to book an expensive vendor for your event when you can set it up yourself in a fraction of the time & save on costs! You can choose from (5) services including entire room uplighting, wedding monogram lighting, cake spotlight, backdrop drapery & dancing on a cloud machine. Our affordable prices offer more options. Keep reading & find out what makes this complete DIY package so popular with FREE shipping nationwide. Read More...
EVERYTHING YOU COULD EVER WANT
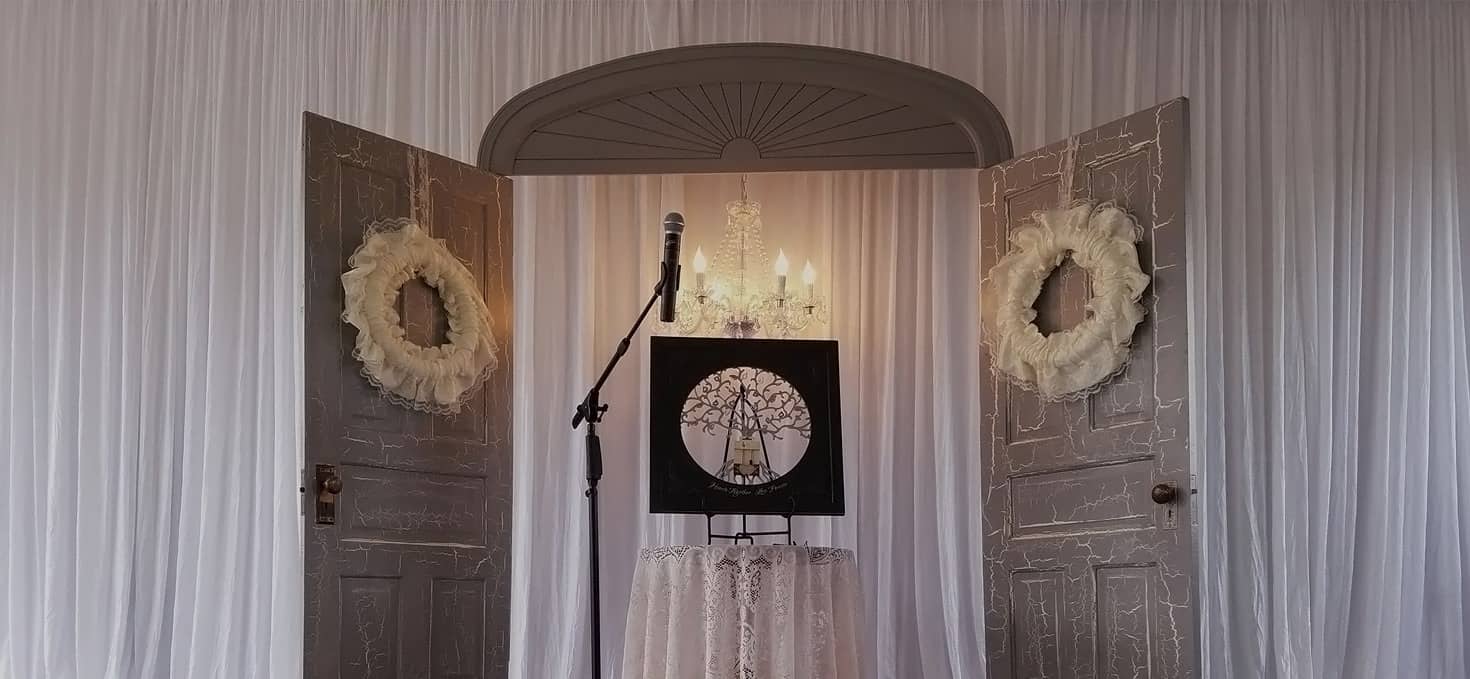
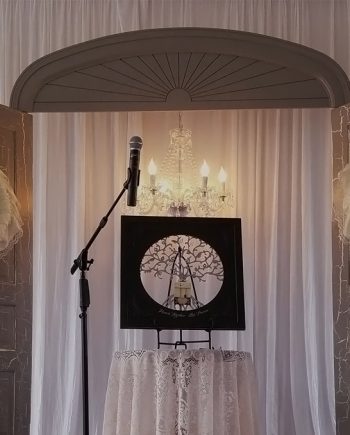
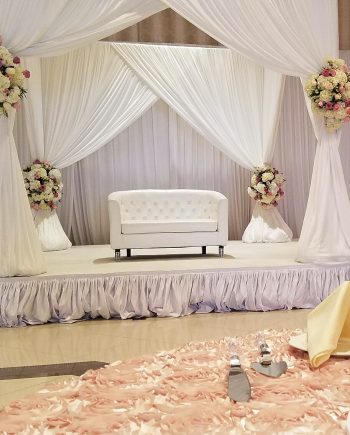
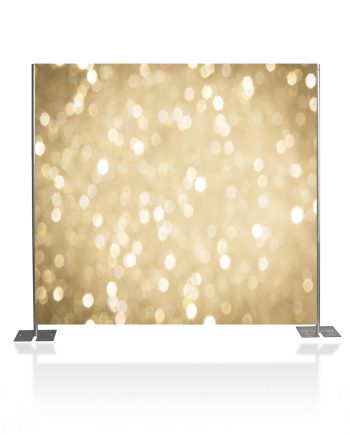
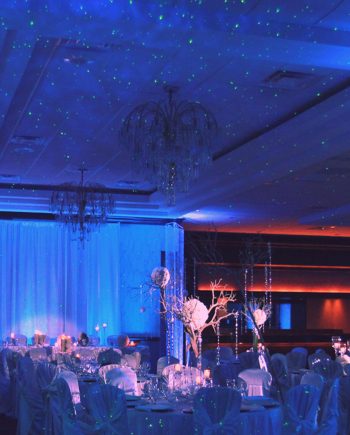
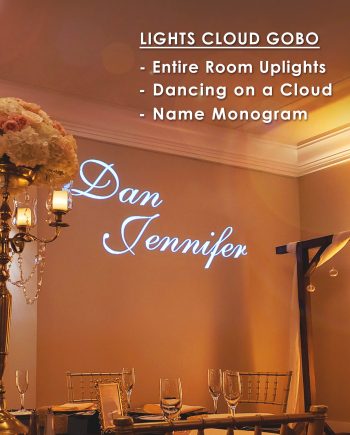
We wanted to create a package that gave you the best of both worlds. A package that worked with your budget while transforming your wedding reception effortlessly. To add color to your space, you also get (10) DIY uplights. Mix and match the colors to compliment your theme, décor, and event space. The monogram has a zoom so it’ll fit on almost any wall. Use the spotlight to accent your cake, door, or formalities. Setup drapery for backdrops, ceremonies, or doors. We even included a cloud machine to use for special dances & entrances.
WE CALL IT THE NATION’S MOST POPULAR BUNDLED PACKAGE
To give you the best bang for your buck our uplighting offers serious power with user-friendly WiFi smartphone control. You get the same drapery that professional event groups use. We made sure that no corner was cut. We believe this bundle offers the best value nationwide & this is why we call this the ‘Epic Experience Package’. Together let’s make your dream celebration become a reality with our DIY wedding bundles & packages. Check your dates availability & reserve your experience below!
LEARN how to email custom artwork after you have placed an order
Get Important Advice Before You Rent this Bundle >>
.
Room Uplighting
- Avoid setting up lights in areas that are not under your supervision (the equip rentals with containers must be sent back to us in the same condition)
- Don’t misplace any packages or materials for your shipment (you can store this underneath a table to prevent someone from taking or throwing this away)
- Raise uplighting easily just adjust a side bracket (don’t make the screw overly tight to prevent it from stripping)
- Keep your cord management clean by plugging it between the wall and uplight
- When there are no plugs near you, try using an extension code, you can add these to your package
- Position lighting so it lights the ceiling, give it a slight angle toward your walls
- Refrain from placing uplighting in busy areas with guests walking (you don’t want anyone accidentally knocking it over)
- Place uplighting right next to your wall this keeps guests from hitting a light with their foot
- Use spacing that is the same between all uplighting so it looks even in your room
- Whenever running a cable across a door make sure to tape it down or place a rug over it so it is safe
- Rooms with many windows let in a lot of light, uplights will be more noticeable after the sun sets Tool to Calculate When Sun Rises & Sets
- Never light up areas that have access to the public (all rented items will need to be safely returned in the same shipping box)
- Keep all shipping containers & included materials (you can store this under tables so no vendors or guests throw it away accidentally)
- If you feel it is needed use an adjustable ladder during the setup
- Position the design from your monogram light higher or lower with the brackets on the side (only hand tighten so it doesn’t damage the screws)
- Monograms look best when aimed onto flat surfaces that are not dark-colored (for example a monogram looks better on white wallpaper than on dark wood)
- Get the best result by using a large enough design by adjusting the top knobs so your projection fits the wall you aiming onto
- Keep in mind you may have to place the monogram in another location if your first area does not give you the result you want (for example your monogram may be too close or too far away from a wall)
- Raise your monogram above guests’ heads by using an additional light stand with a plunger, this helps ensure a clear image without any shadows from guests walking in front of it
- Try to keep the monogram aimed straight onto the projected surface (this will give a design that is legible and doesn’t look distorted or shined on an angle)
- Rooms with sunlight from many windows may keep your monogram from being visible, the image will be more bright after the room becomes dark Use This Sun Rise & Set Tool
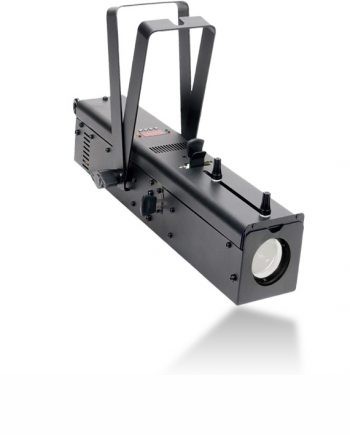
- Never change any pinspot in a closed case. The lack of ventilation causes warping to the power supply.
- Avoid lighting up areas with guests in public spaces (you must return the rentals completely, this includes the containers & all misc equip)
- Keep all materials in the shipping container inside the boxes (you can hide this under a table away from other vendor equipment to prevent it from getting confused with their equipment)
- If you need more height bring an extra ladder to assist with your setup
- Refrain from mounting pinspots on water pipes, cables for electricity, wall lighting/overhead lights, and questionable surfaces
- Focus the pinspots by using the side knob (be sure to tighten just enough so it is not too tight, this might damage the bracket)
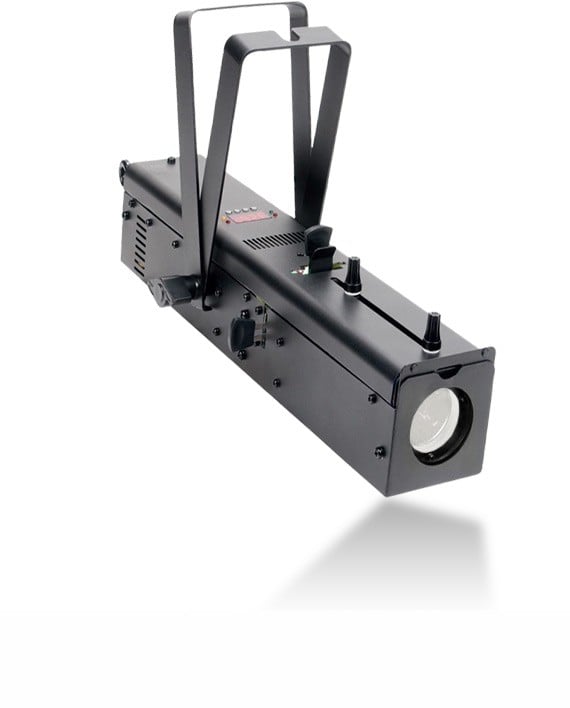
- For best lighting results pinspots should be mounted over the cake or centerpiece you want to light up (it doesn’t have to be exactly overhead but the closer the better)
- When pinspots are mounted with a magnetic base, use in places that don’t have a lot of foot traffic (so a guest doesn’t bump into them)
- If your pinspots are mounted from a base that is magnetic, hide with a votive or floral decor in front (this enhances the effect)
- All pinspot rentals ship fully charged, the batteries last approx 6 hrs, turn on with the power switch and use the included remote to turn off and back on right before the event time starts
- You will notice the lighting effect of pinspots once it becomes darker in your room and the sun dips below the horizon Find Out When It Becomes Dark Here
- Don’t cut any drapery, sew it, or dye the color, all drapes must be returned in the same condition that it was sent out
- Get an exact measurement of the space you want to drape before renting our backdrops
- Hold all drapery in your arms instead of dragging it on the ground to keep the fabric clean and in good condition
- Tell all the people in your event space you’re placing equipment down, this way they know to be careful during setup
- You may need a ladder during drapery setup to help with pleating your fabric, be sure to bring one if you think it is necessary
- Drapery is not recommended for outside setups, all base plates need to be set up flat and level
- Drapery does not cooperate in windy environments, avoid using it outside unless you know what you are doing
- Flowers look great in photos but only use silk arrangements when pinning to drapery, real flowers are typically watered and this can cause green streaks
- Let any other vendors at your event know that you have drapery, this way they don’t mistake it as their inventory or put it in a dirty pile, you should keep an eye on your drapery pile during your setup/tear down so you do not get charged for misplaced rentals
- Drapery should only be used at private events and in areas under the supervision
- Keep all rentals including shipping supplies in a safe location (place any boxes in a room or under a table, you do not want your venue or another company to mistake it for something else)
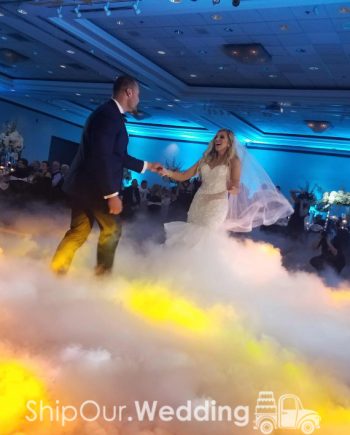
- This is a fog machine, that uses either ice cubes or dry ice, it does not come with ice, you will have to purchase your ice locally to create your low lying cloud effect
- Consult with your venue first to ensure you are approved to use this special effect
- Do not lose the shipping packaging or contents, we recommend storing it under a table so it is not accidentally thrown away by your banquet hall or other vendors (you are responsible for the safe return of all rented items including shipping boxes)
- This machine will more than likely not set off a fire alarm (this all depends on your venue’s alarm sensitivity to fog effects)
- The machine takes 4 lbs of ice (dry ice pellets work the best)
- Find the nearest dry ice supplier near me
- Use heavy-duty insulated gloves anytime you are handling dry ice (not provided)
- If you do not have access to dry ice pellets, you can buy blocks of dry ice from the grocery store (to maximize your effectiveness, carefully try to break them into small pieces with a hammer while the ice is still in the bag)
- Only have an adult 18 years or older operate this machine, transport ice in an icebox (slightly crack the lid to allow pressure to escape), and cover a blanket over the top of the ice in the box to reduce the ice sublimation rate
- When you have the dry ice at your venue, store it in a safe locked room (in an area that can’t get knocked over), keep a slight crack in the lid to allow pressure to escape, and keep supervised and out of reach of children
- Do not load ice into your machine until 5 minutes before it is time to use it
- This fixture requires 700 watts to warm up the fog, use a separate circuit with nothing else on it to prevent it from tripping
- If you trip a circuit, unplug the fixture, reset the breaker for the circuit, and then use this further down the wall on another circuit
- This dry ice fog effect works better in cold rooms (cloud will have a longer hang time)
- Use this effect with wireless uplighting to have your cloud light up and change colors
- The fog cloud effect will last approximately 8 minutes
- Have a cloth/towel nearby the machine in case there is a need to quickly wipe up any condensed water off your dance floor once done with the dancing on a cloud effect
- When you are done empty the ice, drain the water, and drain all fog juice from the tank. Cloud machines must be completely emptied before shipping back to avoid a cleaning fee.
.


Michelle Kashou –
We rented a bundled package since we wanted multiple services. I really didn’t think I needed the cake pinspot but it was only $10. I am so glad that I added that to my package. It made my cake look way more expensive than what I paid for it. The lighting and drapery really helped to transform our venue. Also, the photo booth was a complete success. I definitely recommend this package for weddings.