


Description
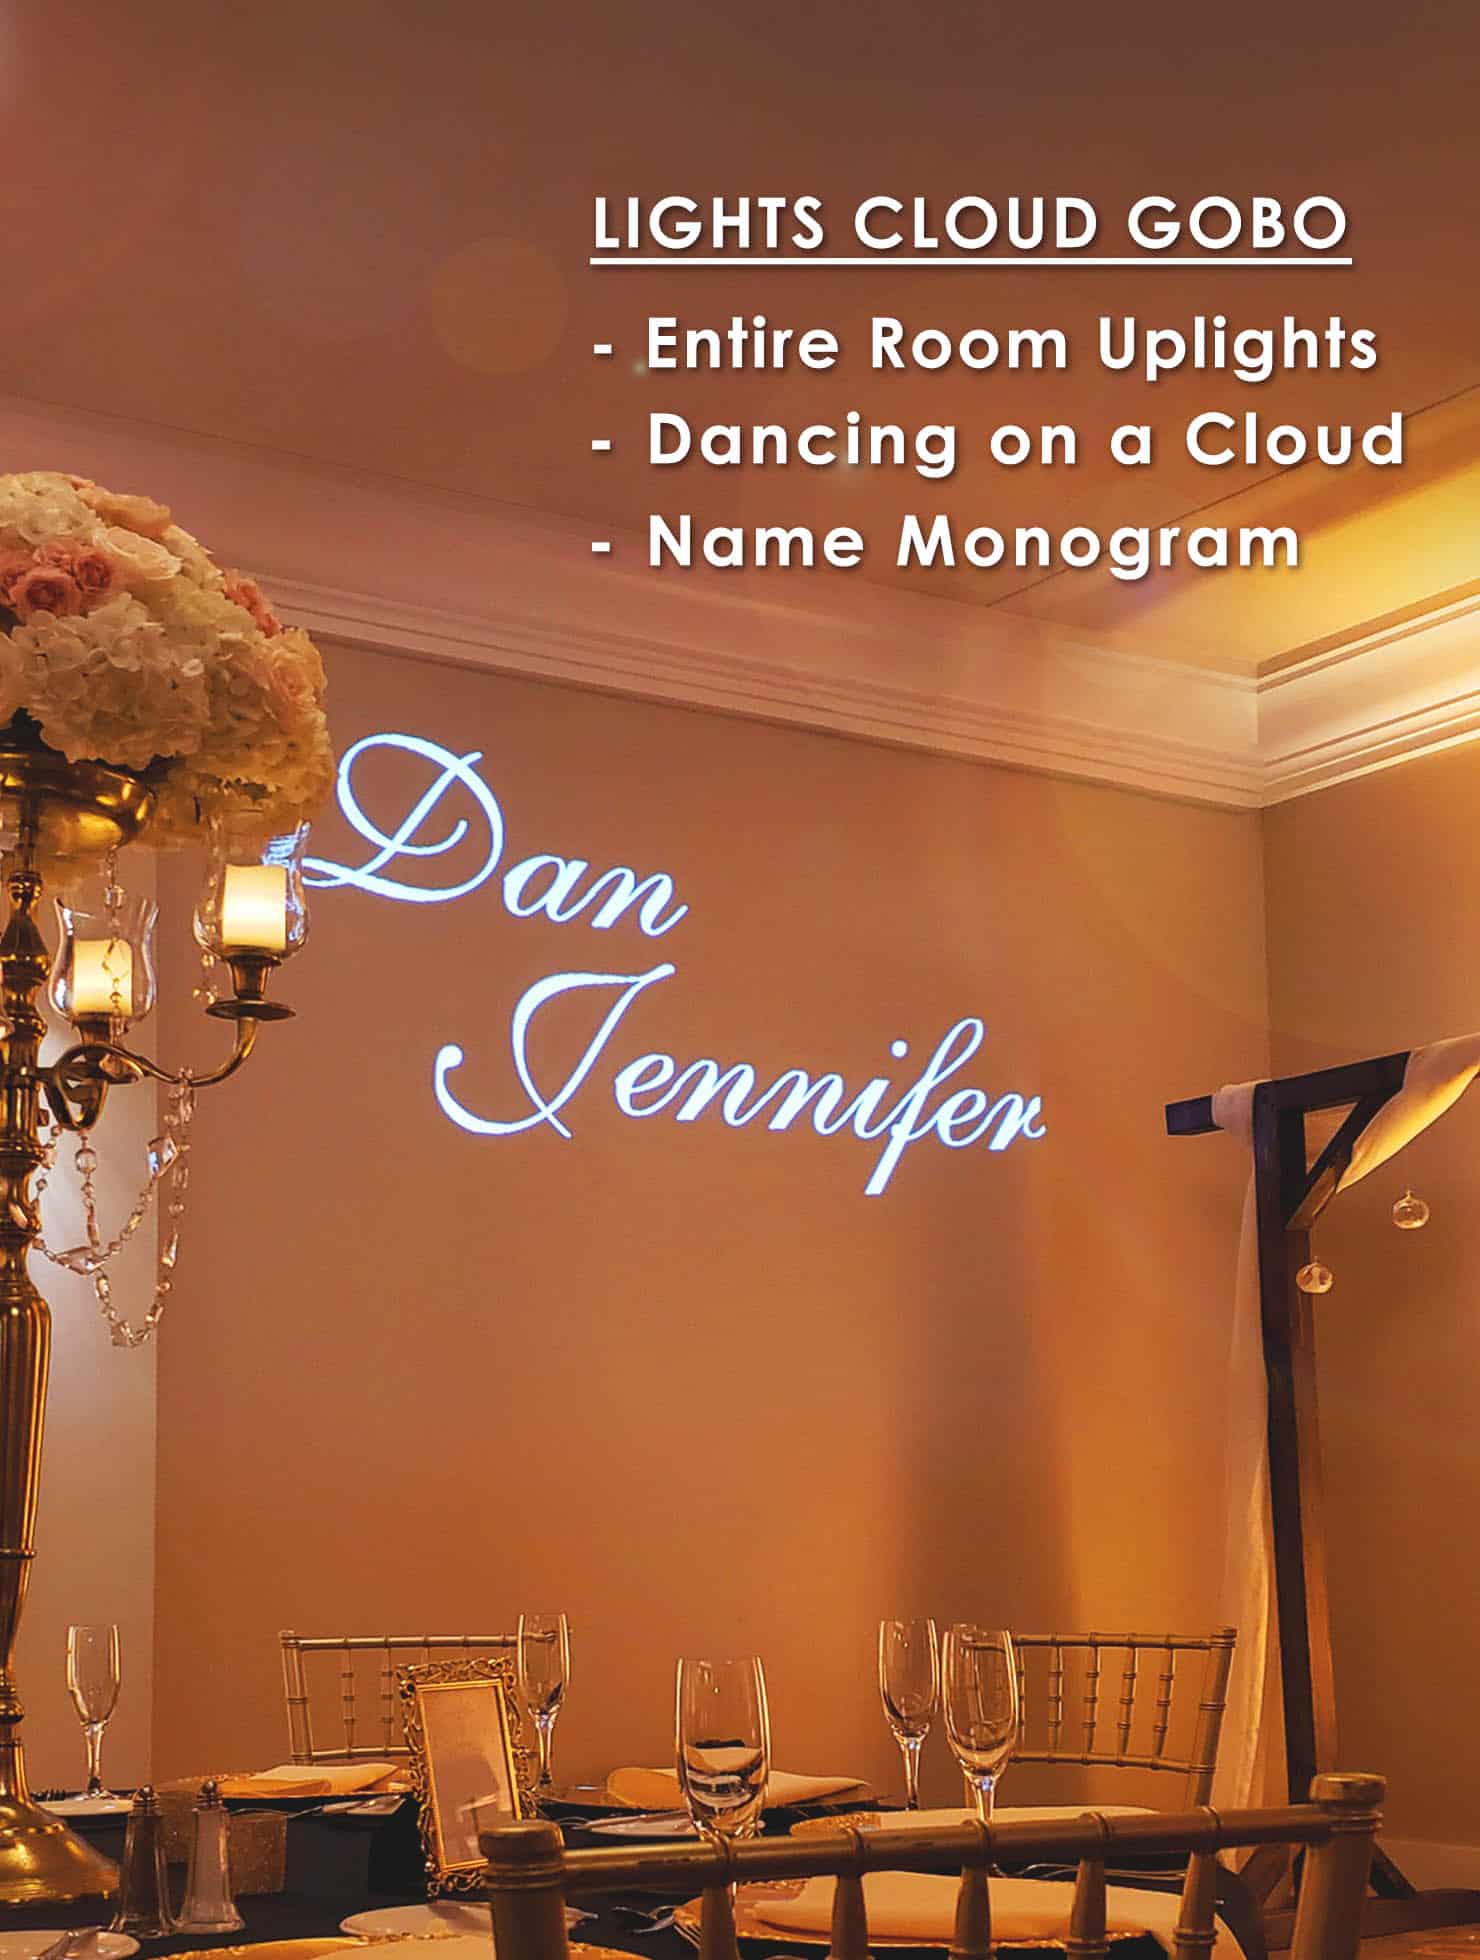
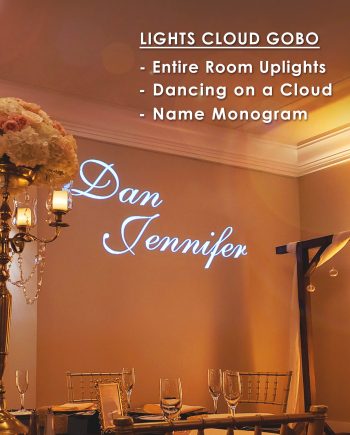
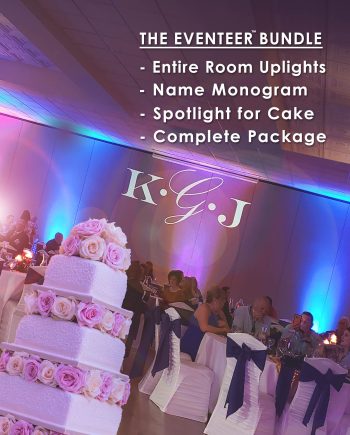
This up-light, cloud, and gobo monogram package give you the best of both worlds. Now you don’t need to book expensive vendors. Do this yourself with easy setups & keep your event under budget! We’ve combined both lighting & entertainment options to maximize guest enjoyment. This bundle includes room uplighting, dancing on a cloud, as well as a wedding monogram lighting. This bundle is affordable and delivers gorgeous results. Continue reading about this popular package. Read More...
AN AMAZING TRIO OF DIY SERVICES
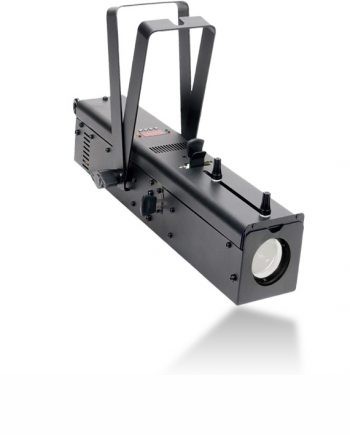
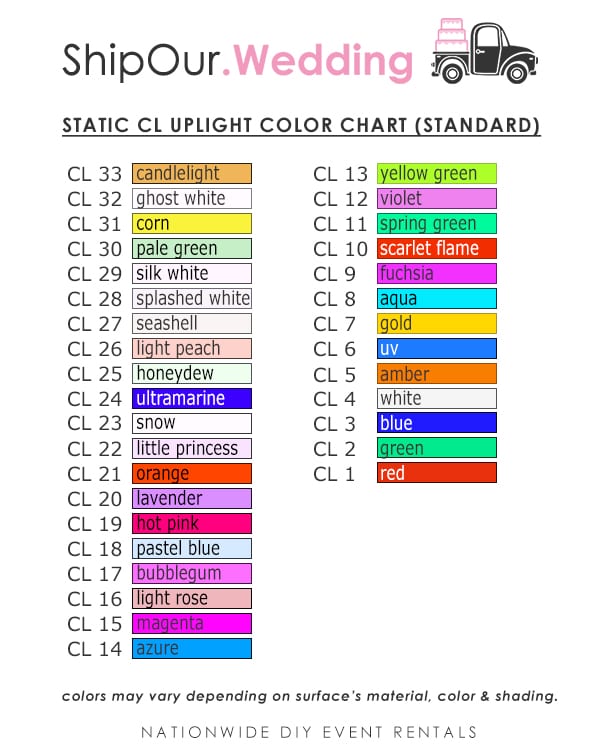
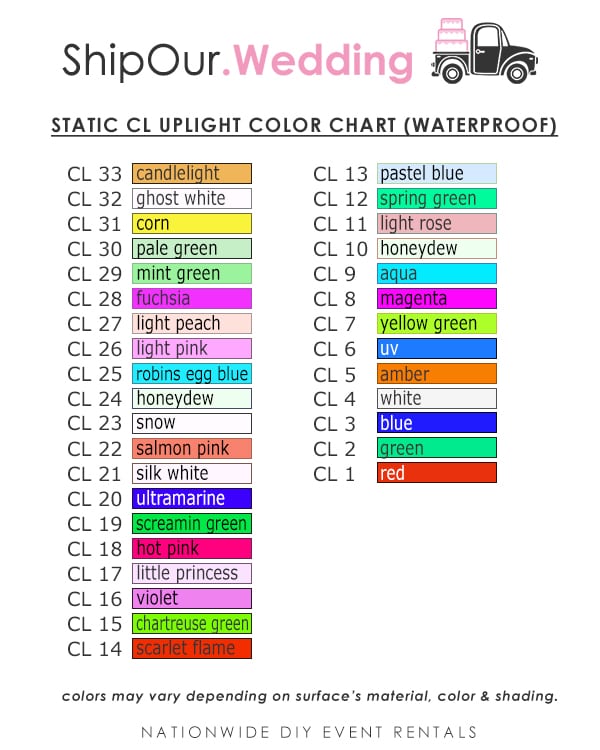
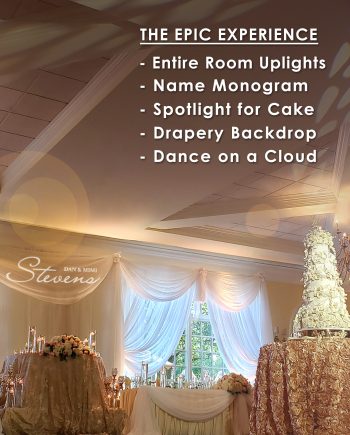
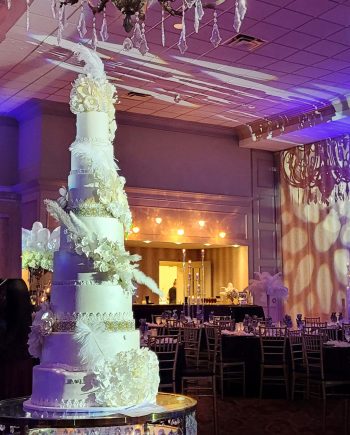
We created this package because it is big on service & light on price (no pun intended). This bundle is great for lighting up your space while adding in the fun factor. We suggest (10) uplights to splash colors onto your walls. Larger rooms with 150-225 guests should rent (20) uplights. 225+ we recommend (30) uplights. Alternate lighting colors to work with accents. The gobo monogram creates a focal point for your photos. With the flexibility of our zoom feature, you can aim this in a prominent area of your event. Lastly, we made sure to include an amazing cloud rental! This way you can highlight the important events with a stunning effect.
WE KNOW YOU & YOUR GUESTS WILL LOVE OUR RENTALS
Our focus has always been to offer you the BEST value. So rent with confidence knowing our uplighting has more power and options with WiFi-enabled control. The name monogram is bright enough for photos & looks breathtaking with uplighting. This package will enhance your entire experience. This is why we know you & your guests will love our rentals. In show business, they say, ‘lights… camera… action!’ With this package, it’s all about, ‘lights… cloud… gobo!’ Plan the event of your dreams under budget. Get started & check your date’s availability below.
🎨 LEARN how to email custom artwork after you have placed an order
Read Very Important Tips to Know When Renting this Package >>
.
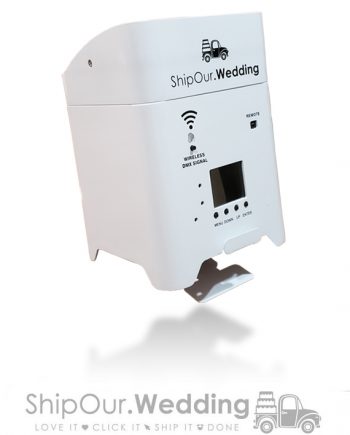
Room Uplighting
- All our lights should be used at private events with close supervision (all rentals and packages must be returned back to our warehouse)
- You don’t want to misplace any boxes or shipping materials (keep items together in the same box and when not being used place your box in a location that others don’t have access to)
- Get more height by using side brackets (make sure the screws are not too tight, it can cause thread stripping)
- Ensure a clean look by having any power cords come out the back wrap nicely then run it towards the plug against a wall
- Use an extension cord for power not located near lighting rentals (you can rent them here)
- Lighting should aim up your wall, when positioning give it a slight tilt towards your wall
- Avoid using lighting in areas your guests will be walking (so you don’t have to keep adjusting them during your event)
- All rentals should be as close to the walls as possible (so it is out of the way when guests walk)
- Remember spacing with laying down your lights you want them to have the same distance between each light
- Any cords that cross a doorway need to be secured, use a small rug/carpet, if not available use tape (remove any tape from the wiring after your event)
- Rooms with windows will let in natural light, this prevents any lighting from having an impact wait until the time your sunsets to see major lighting results
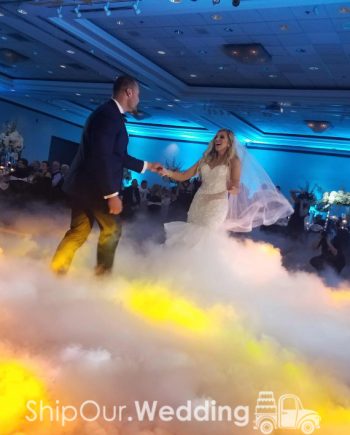
- This is a fog machine, that uses either ice cubes or dry ice, it does not come with ice, you will have to purchase your ice locally to create your low lying cloud effect
- Consult with your venue first to ensure you are approved to use this special effect
- Do not lose the shipping packaging or contents, we recommend storing it under a table so it is not accidentally thrown away by your banquet hall or other vendors (you are responsible for the safe return of all rented items including shipping boxes)
- This machine will more than likely not set off a fire alarm (this all depends on your venue’s alarm sensitivity to fog effects)
- The machine takes 4 lbs of ice (dry ice pellets work the best)
- Find the nearest dry ice supplier near me
- Use heavy-duty insulated gloves anytime you are handling dry ice (not provided)
- If you do not have access to dry ice pellets, you can buy blocks of dry ice from the grocery store (to maximize your effectiveness, carefully try to break them into small pieces with a hammer while the ice is still in the bag)
- Only have an adult 18 years or older operate this machine, transport ice in an icebox (slightly crack the lid to allow pressure to escape), and cover a blanket over the top of the ice in the box to reduce the ice sublimation rate
- When you have the dry ice at your venue, store it in a safe locked room (in an area that can’t get knocked over), keep a slight crack in the lid to allow pressure to escape, and keep supervised and out of reach of children
- Do not load ice into your machine until 5 minutes before it is time to use it
- This fixture requires 700 watts to warm up the fog, use a separate circuit with nothing else on it to prevent it from tripping
- If you trip a circuit, unplug the fixture, reset the breaker for the circuit, and then use this further down the wall on another circuit
- This dry ice fog effect works better in cold rooms (cloud will have a longer hang time)
- Use this effect with wireless uplighting to have your cloud light up and change colors
- The fog cloud effect will last approximately 8 minutes
- Have a cloth/towel nearby the machine in case there is a need to quickly wipe up any condensed water off your dance floor once done with the dancing on a cloud effect
- When you are done empty the ice, drain the water, and drain all fog juice from the tank. Cloud machines must be completely emptied before shipping back to avoid a cleaning fee.
- As with all our rentals only used in areas that you have control, this means rentals can not be set up in locations open to the public with heavy traffic (you will ship back all rentals and misc supplies)
- Everything that was sent to you needs to be sent back to us (keep an eye on your foam, containers, instructions & rentals, when not being used lockup in a room that other guests and vendors can not access)
- If the height is a concern then have a ladder available to improve your setup
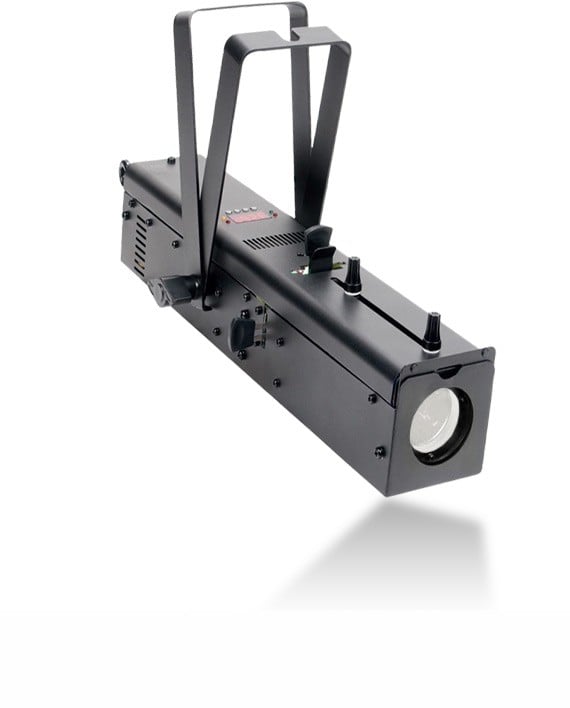
- Your monogram light can be adjusted simply by moving the side brackets (this helps position your pattern)
- Avoid lighting up dark surfaces or draping with pleats (the reason why is because it will take away from the effect)
- Always adjust the zoom/focus so that your light is large enough to fit your desired area comfortably
- If you are trying to set up in a location and it doesn’t look good try a 2nd setup area, the name size is determined by how far away you are from the wall (this is called throw distance, view our chart in the tabs above for the calculations)
- The higher your light the more likely your image won’t get blocked by guests walking in front of it, get your light tripod stand & connecting plunger adapter to do the job right
- Try not to aim the light sideways onto a wall, you want a straight shot of the projected beam, this makes it easier to read from anywhere in your room
- Rooms with windows take away from the lighting brightness, find out when your sun will set

 Scan this Code for
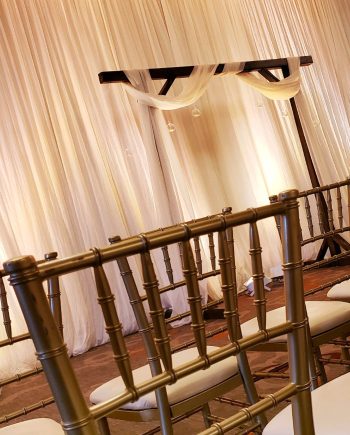
Reviews
There are no reviews yet.